

How To Install Wordpress On Your Domain
How to Manually Install WordPress on an Empty Site

Kinsta offers easy 1-click installs of WordPress, but there might be times when you lot need to manually install WordPress. A mutual scenario we run into is if you have already created a new WordPress install at Kinsta, but with the option not to install WordPress. This leaves you with an empty site. Follow the steps below to manually install WordPress. It'due south easier than yous think!
Note: If y'all accept any empty site at Kinsta and don't need anything from information technology (configuration), a faster way to go up and going is to just delete the site and copy it using the piece of cake WordPress install option in MyKinsta. Otherwise, you can proceed with the steps below.
How to Manually Install WordPress
For this tutorial, nosotros'll assume you already accept an empty site created in the MyKinsta dashboard.
Pace 1
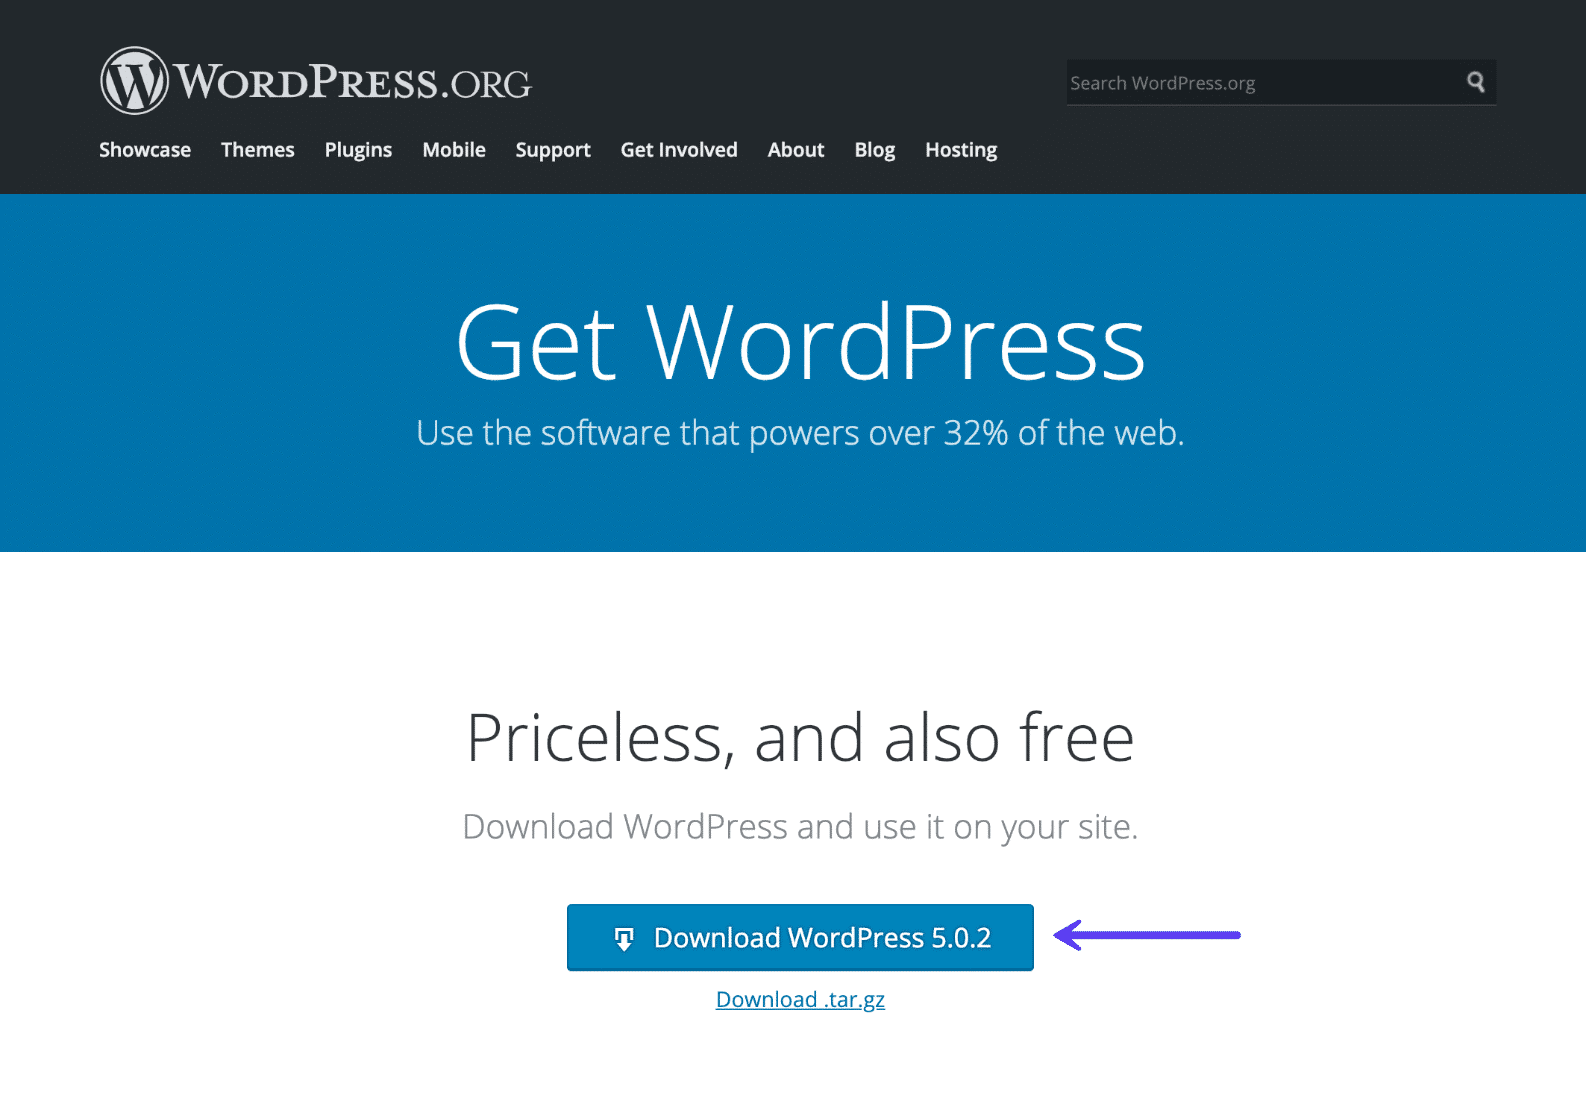
The first matter you lot'll need to practice is download the latest version of WordPress over at WordPress.org. This includes all the installation files.
Step 2
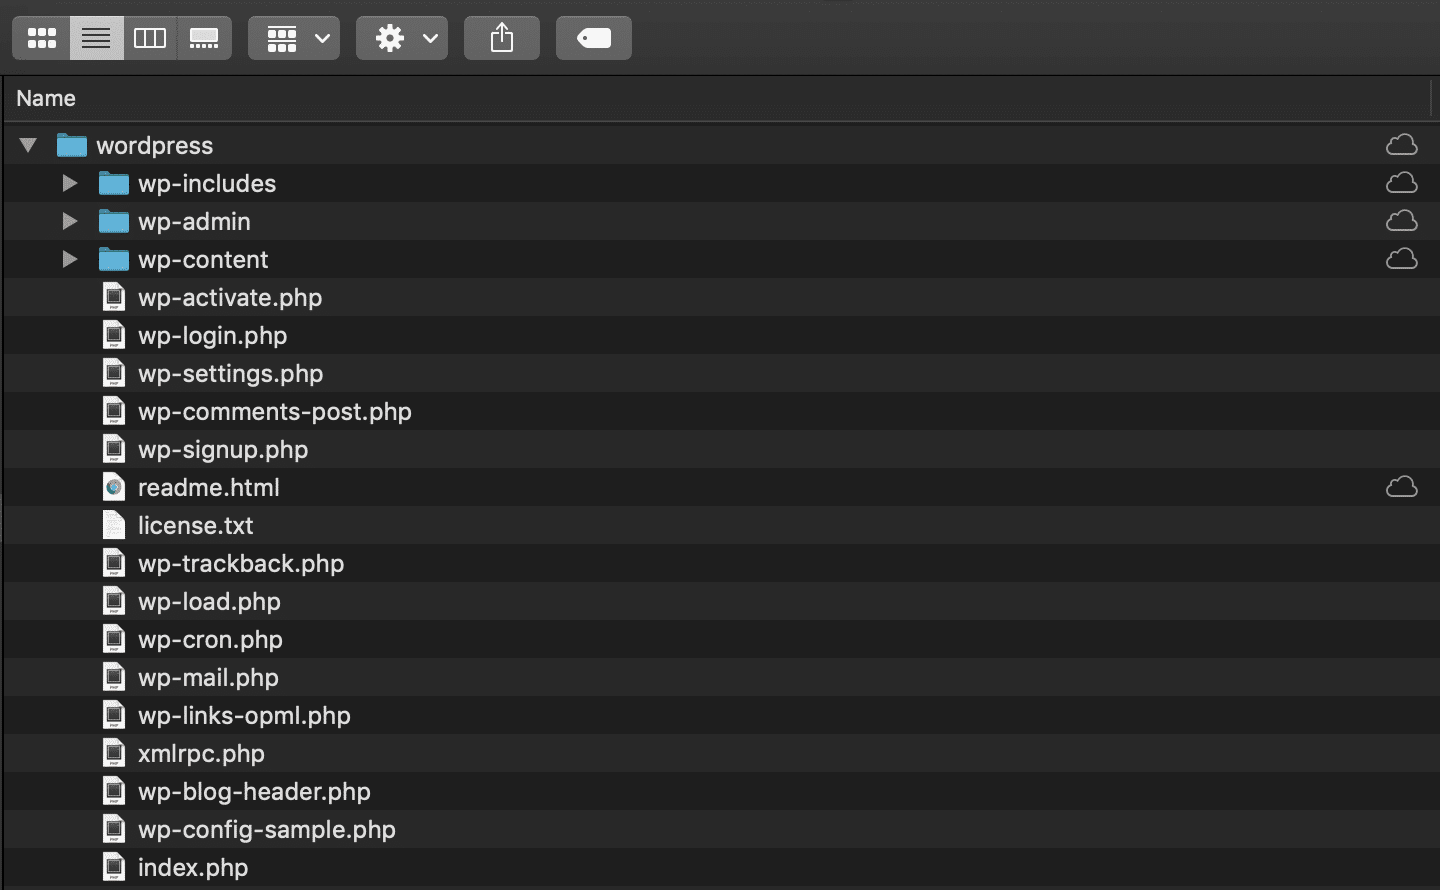
Once the download finishes, excerpt the total contents of the .zip file to your computer.
Footstep 3
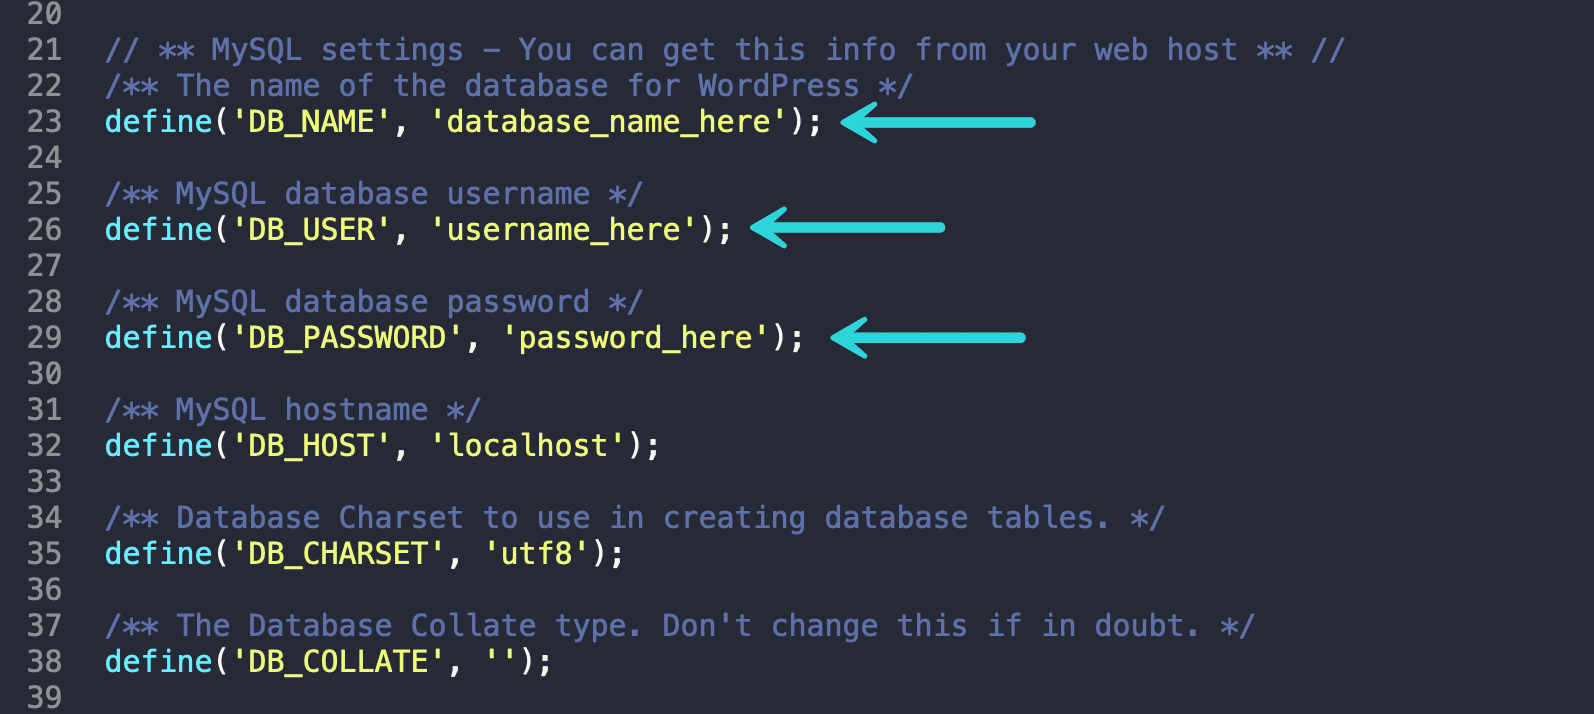
Rename the wp-config-sample.php file to wp-config.php and open up the file to edit the MySQL settings.
Update the DB_NAME, DB_USER, and DB_PASSWORD values. You can get these from your site'southward Info screen in the MyKinsta dashboard. At Kinsta the DB_HOST value can remain as localhost.
Step four
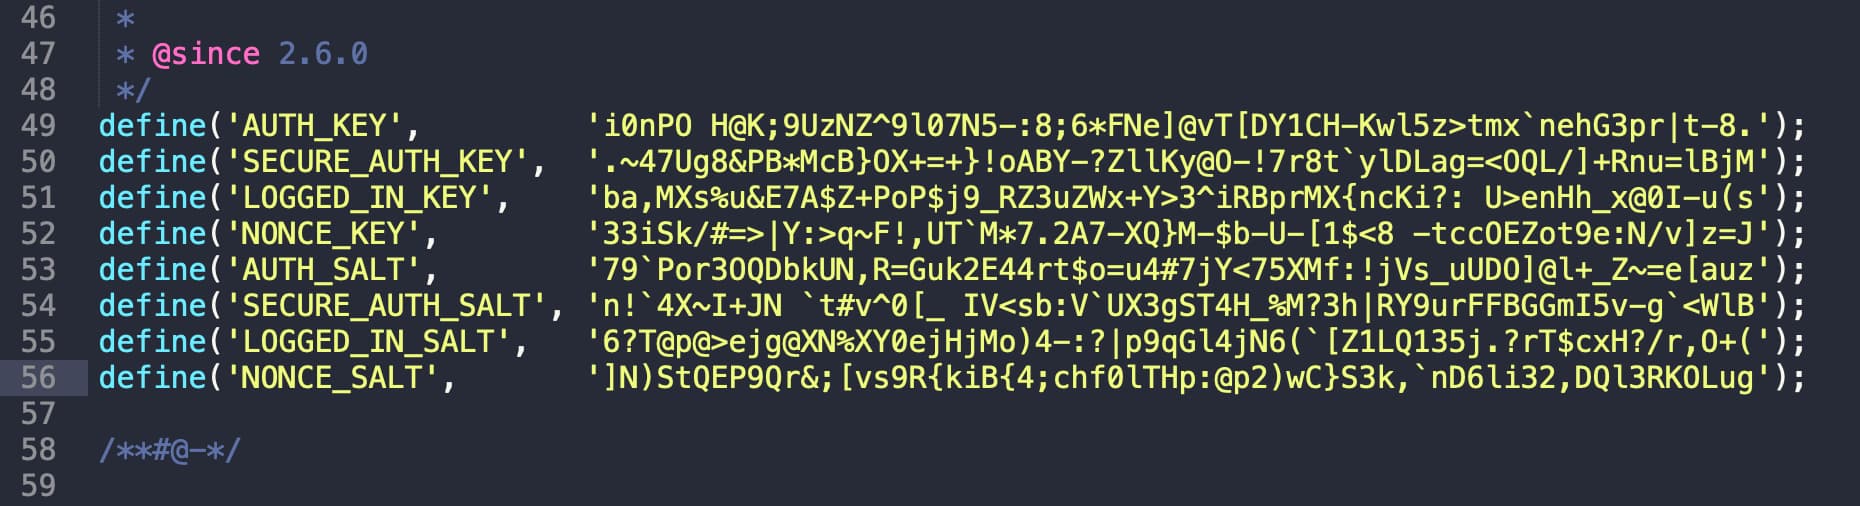
For security, we recommend generating unique WordPress security keys. These security keys are a ready of random variables that improve encryption of data stored in the user's cookies. You tin generate these using the WordPress.org secret-key tool.
Stride 5
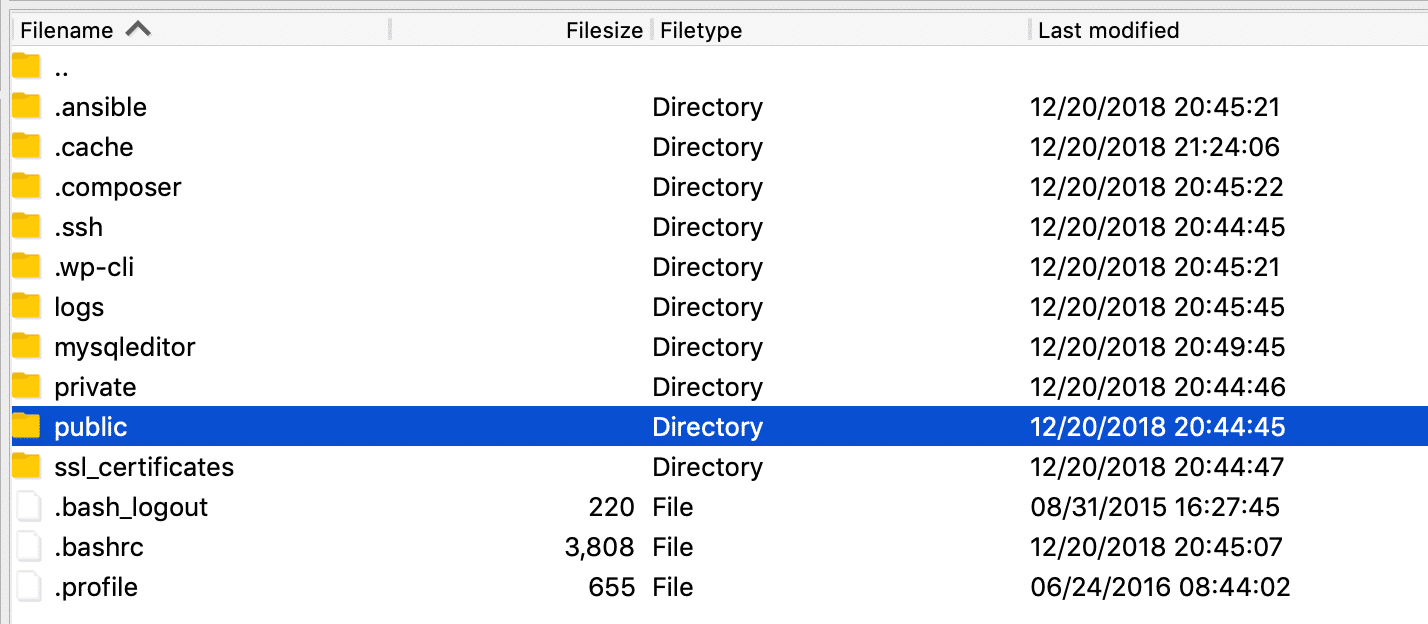
Now that your wp-config.php file is updated, it's time to upload your WordPress installation files to the server. Then you demand to connect via SFTP to your empty Kinsta site.
And then upload the contents of the "wordpress" folder on your local computer into the/www/sitename/public folder. Annotation: y'all tin can delete the readme.html file in the root of the folder every bit this isn't needed. Depending on the speed of your connectedness the transfer of files will take a few minutes.
Step 6
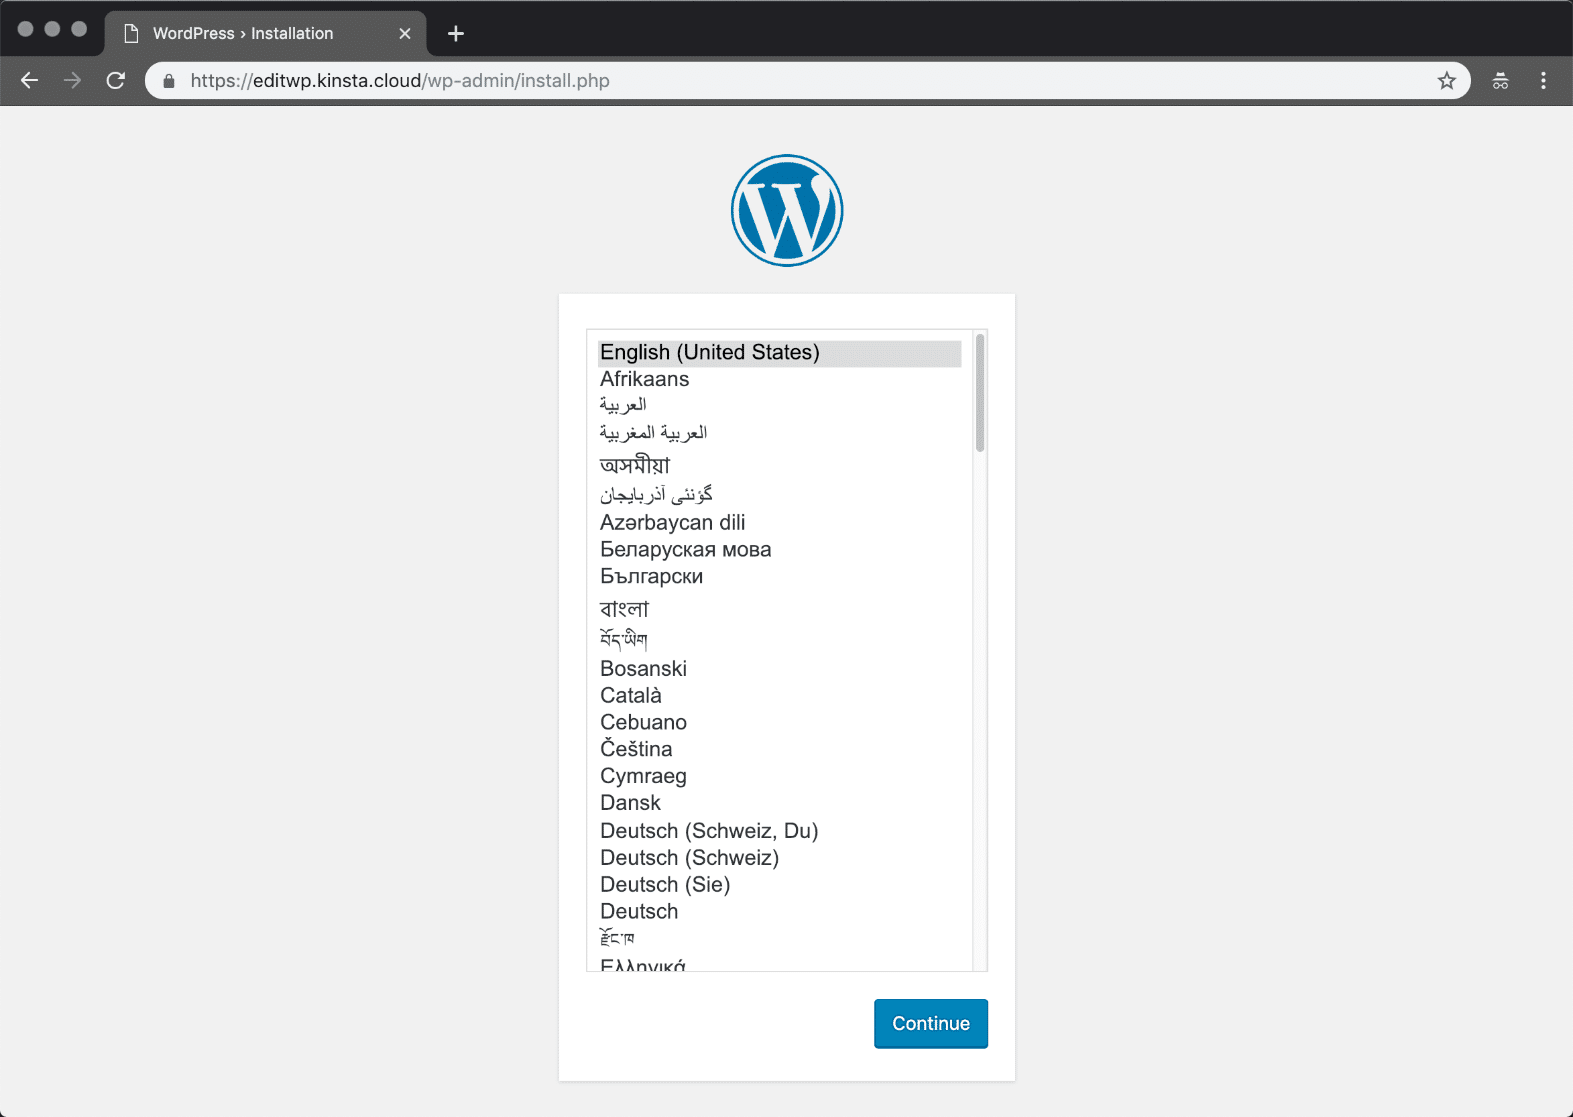
Now you can browse to your empty site to install WordPress. In this instance, we will employ the Kinsta temporary URL (https://yoursite.kinsta.cloud).
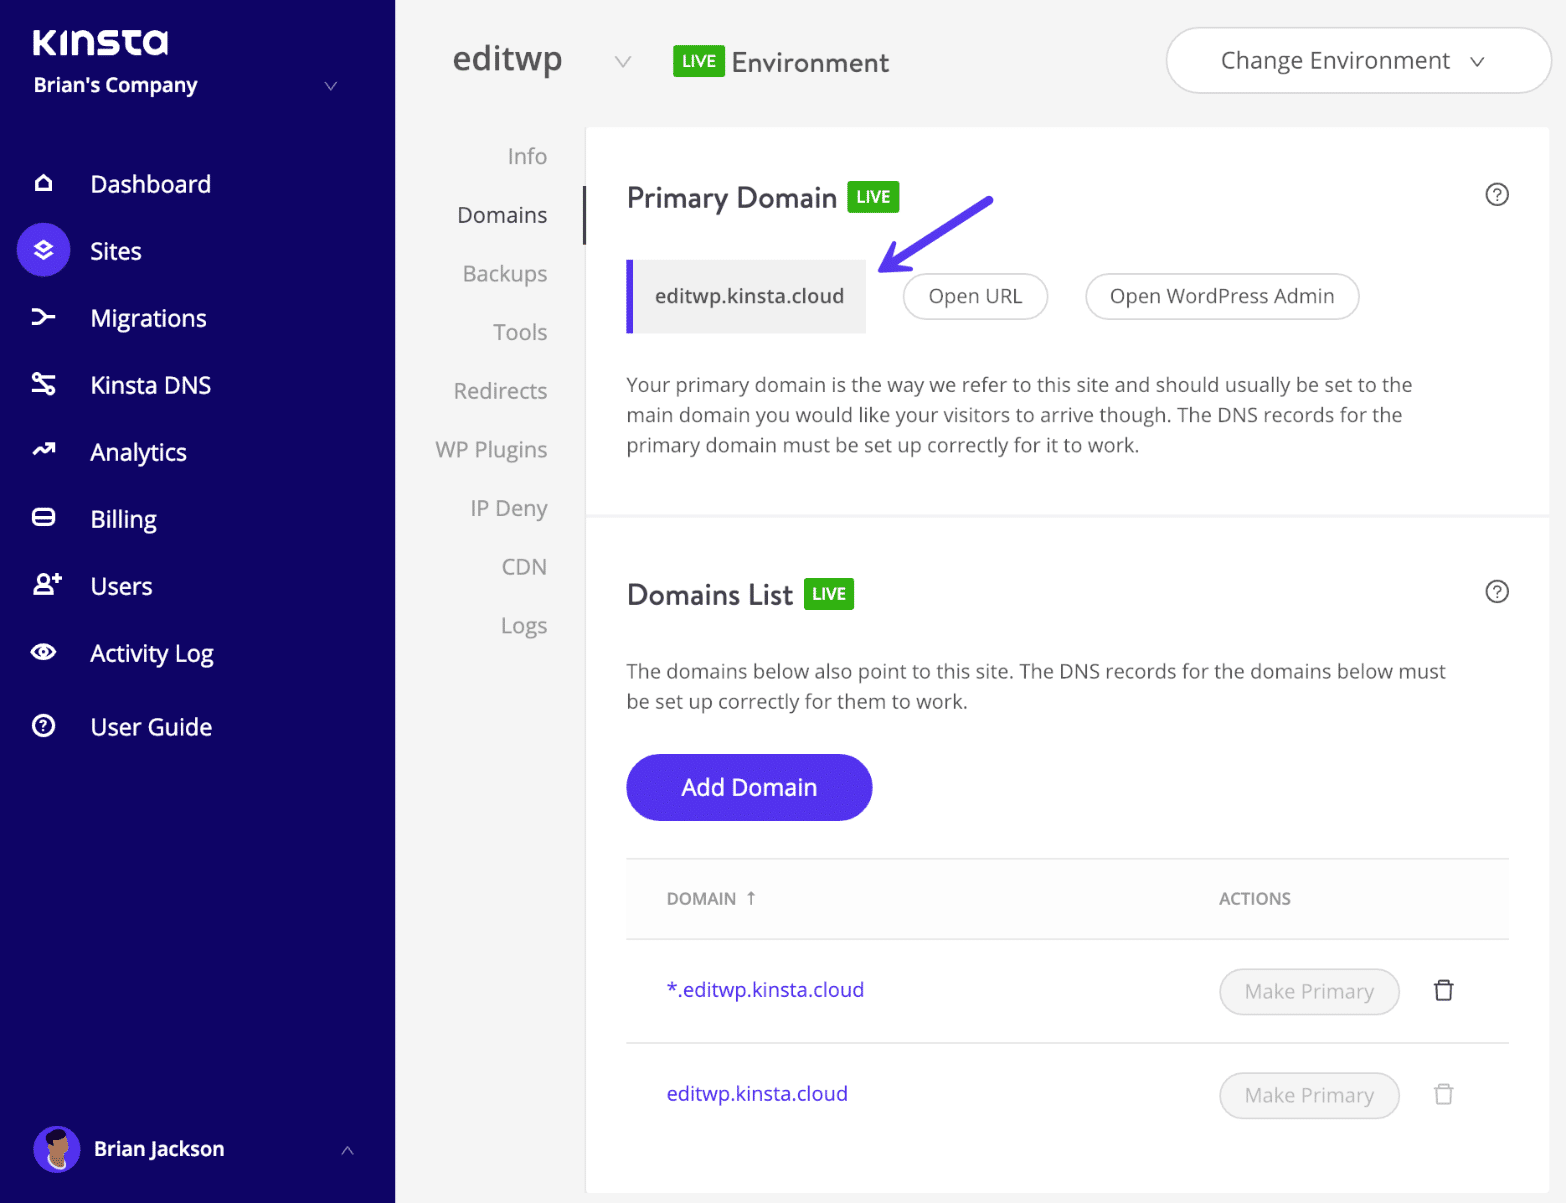
Already Using Custom Domain
If you used the custom domain selection when creating a new site, you tin utilise your custom domain. Just make sure yous have added your domain.
If y'all haven't pointed your DNS yet, yous can do that first. Otherwise, you could install WordPress without pointing DNS by editing your hosts file.
Subscribe At present
Otherwise, you tin go on with the temporary URL for now and change to a custom domain later.
Footstep seven
When y'all start visit your site yous will see the WordPress installer and will need to choose the linguistic communication you want for your WordPress dashboard. And then click "Continue."
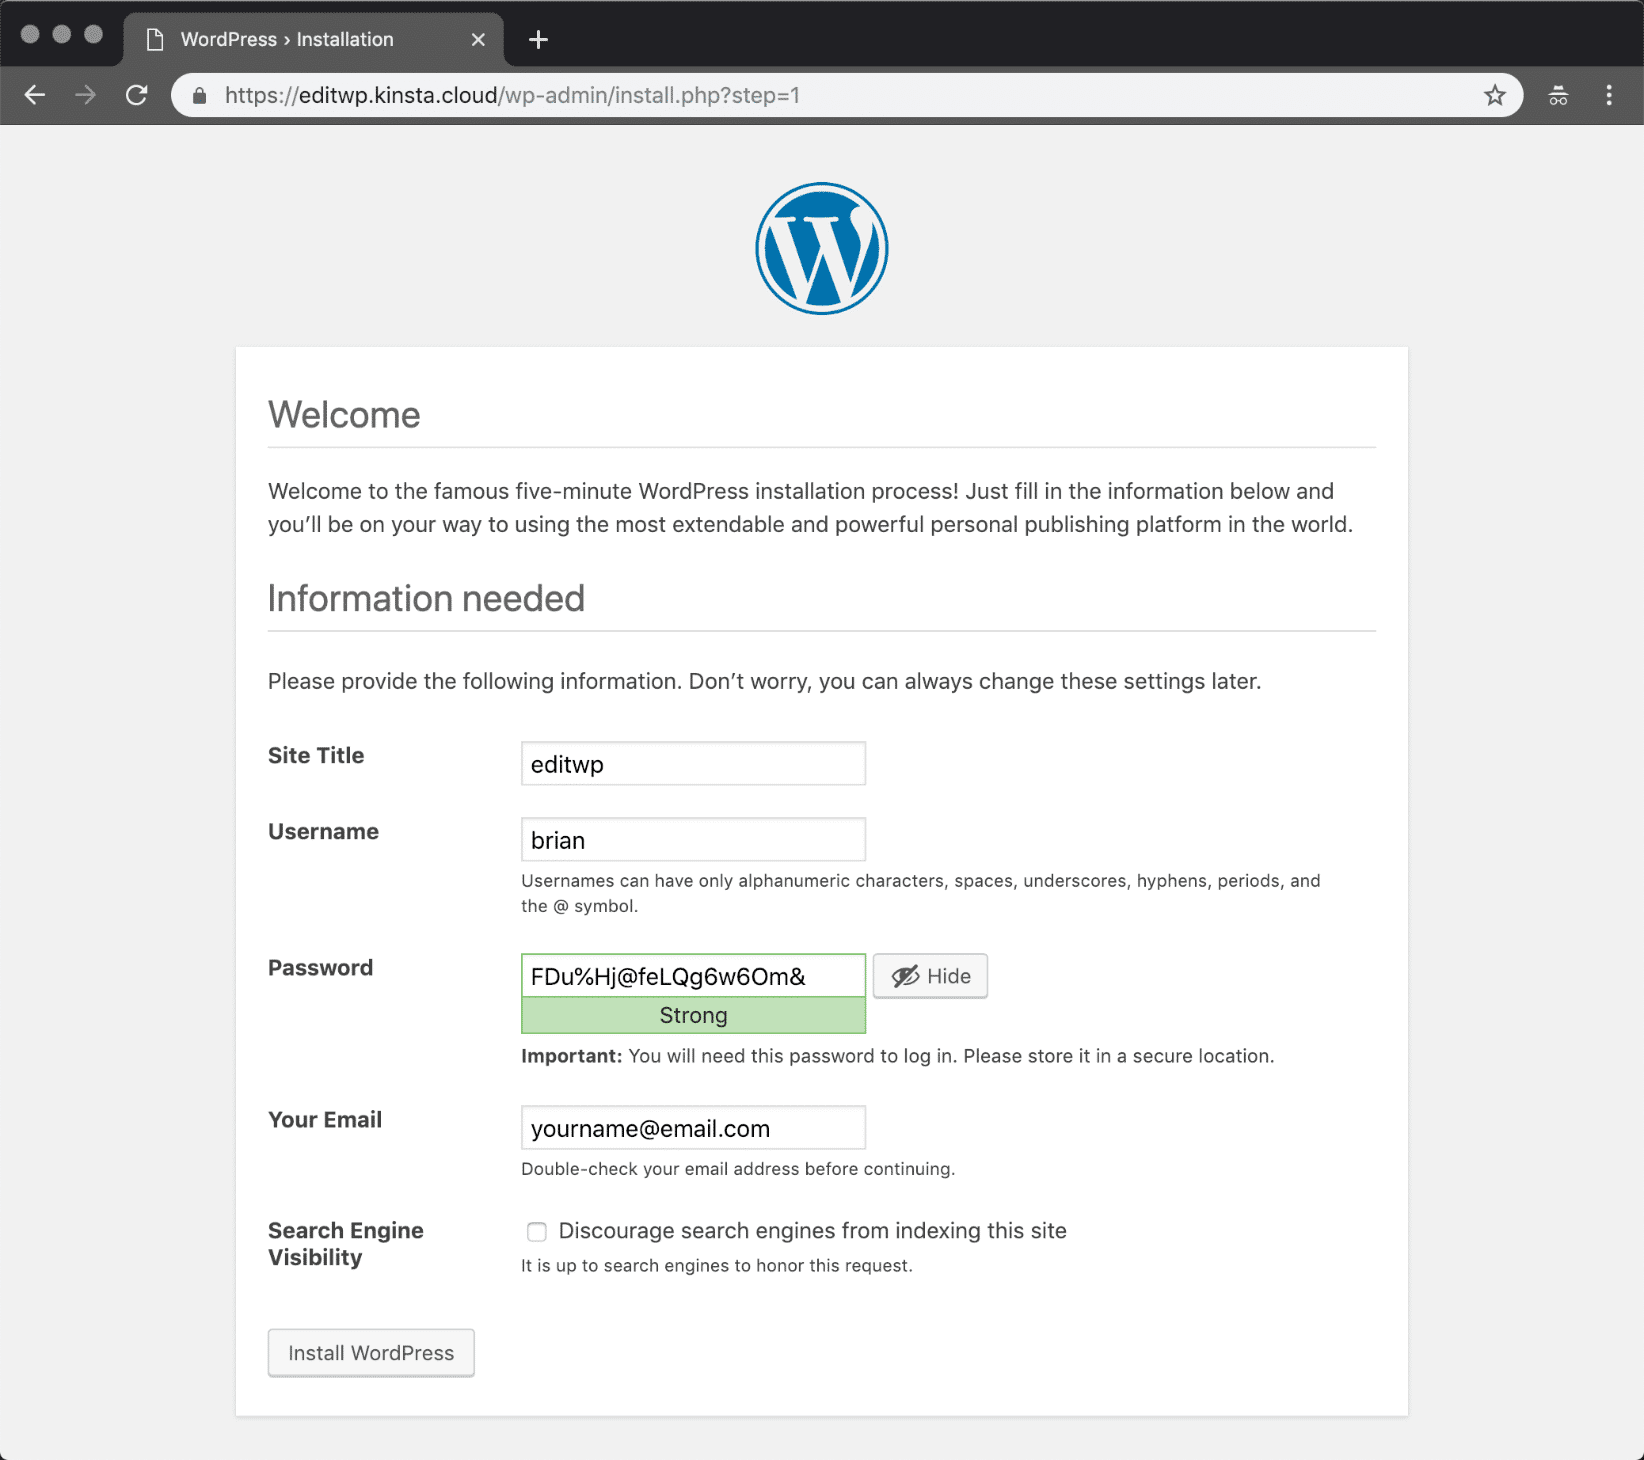
Pace 8
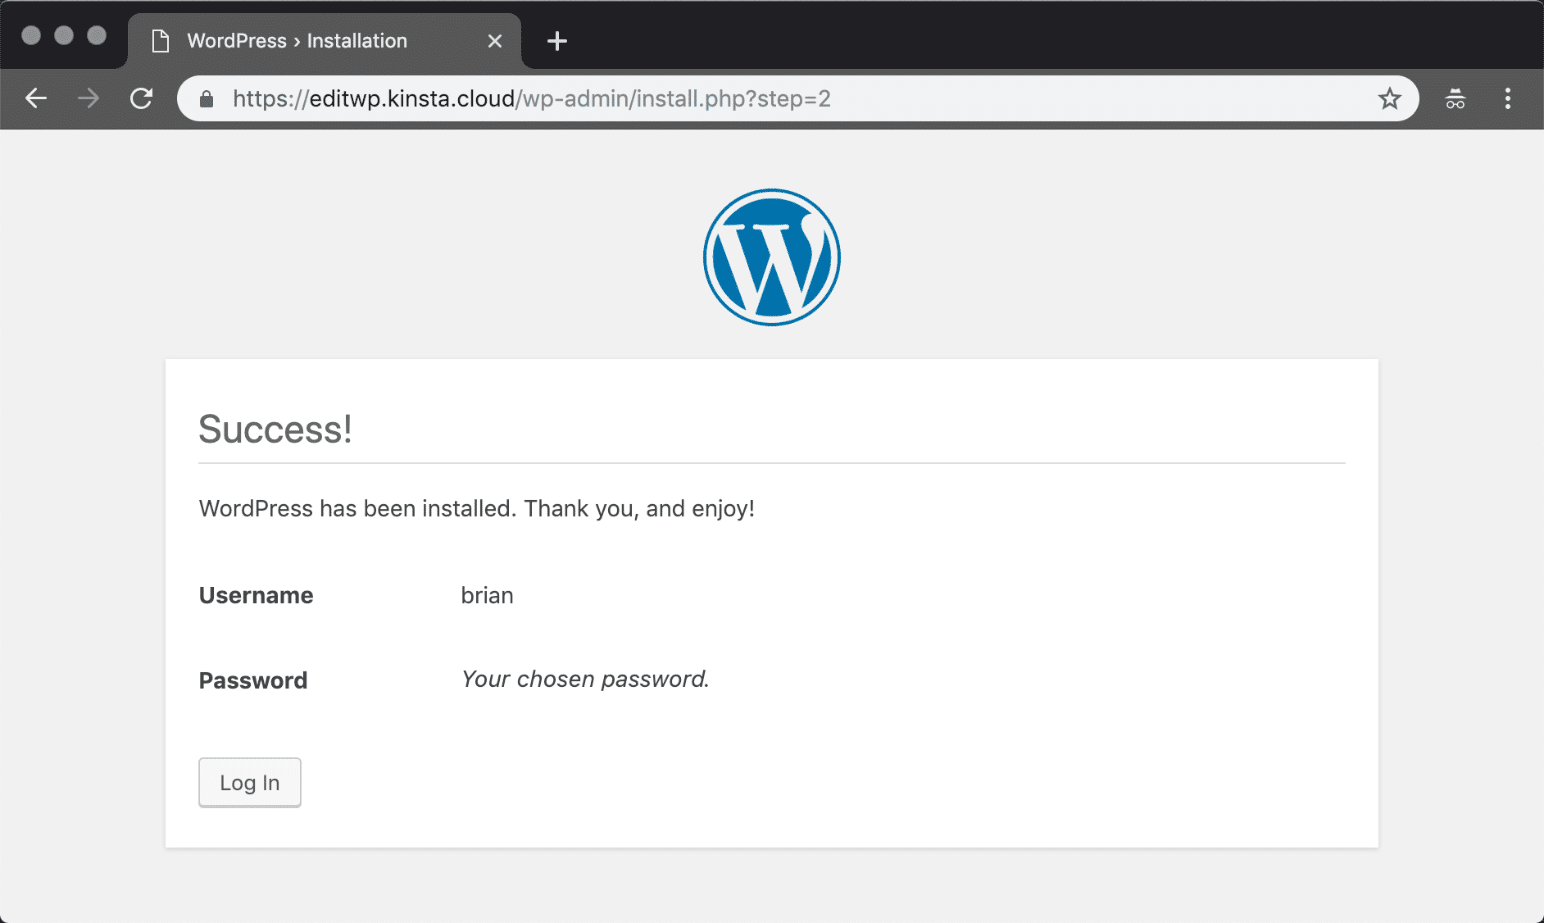
Choose your site name, username, and re-create down your password to a safe place. Input your email and click on "Install WordPress." If you're not wanting search engines to crawl your site yet, y'all can also enable the pick: Discourage search engines from indexing this site. Y'all can always do this subsequently on.
You will see a success confirmation and become an email containing your login URL and username.
Yous can and then log in to your WordPress site. If you're using a temporary URL you can follow the additional instructions below on how to modify it to your custom domain.

Step 9
The final step is a very of import one. Considering you manually installed WordPress, you will demand to asking aid from our support squad to get the Kinsta MU plugin installed. This plugin controls the full page cache, CDN, and other functionality on your WordPress site. Just open up up a ticket and our team can get this installed for you.
Replace Temporary URL with Custom Domain
If you installed WordPress on the Kinsta temporary URL you'll want to update it with your custom domain at some point.
Step 1
Add your domain to the site in MyKinsta, make it primary, and point your DNS to Kinsta.
Pace 2
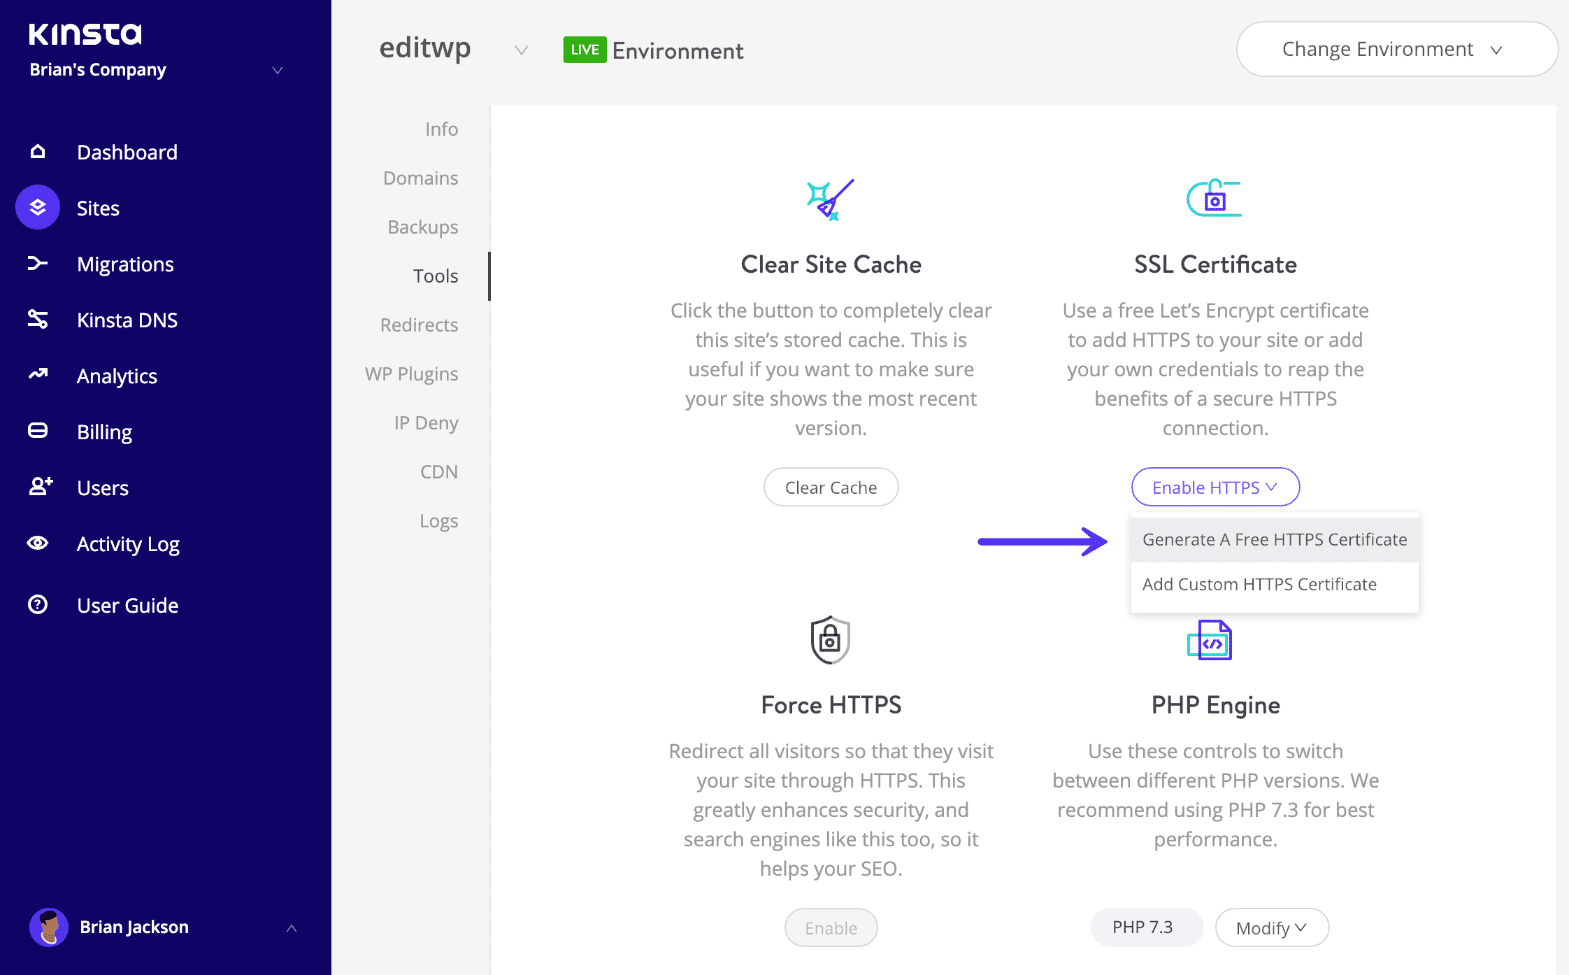
If you lot're using HTTPS, install an SSL certificate from the MyKinsta dashboard nether "Tools."
Step 3
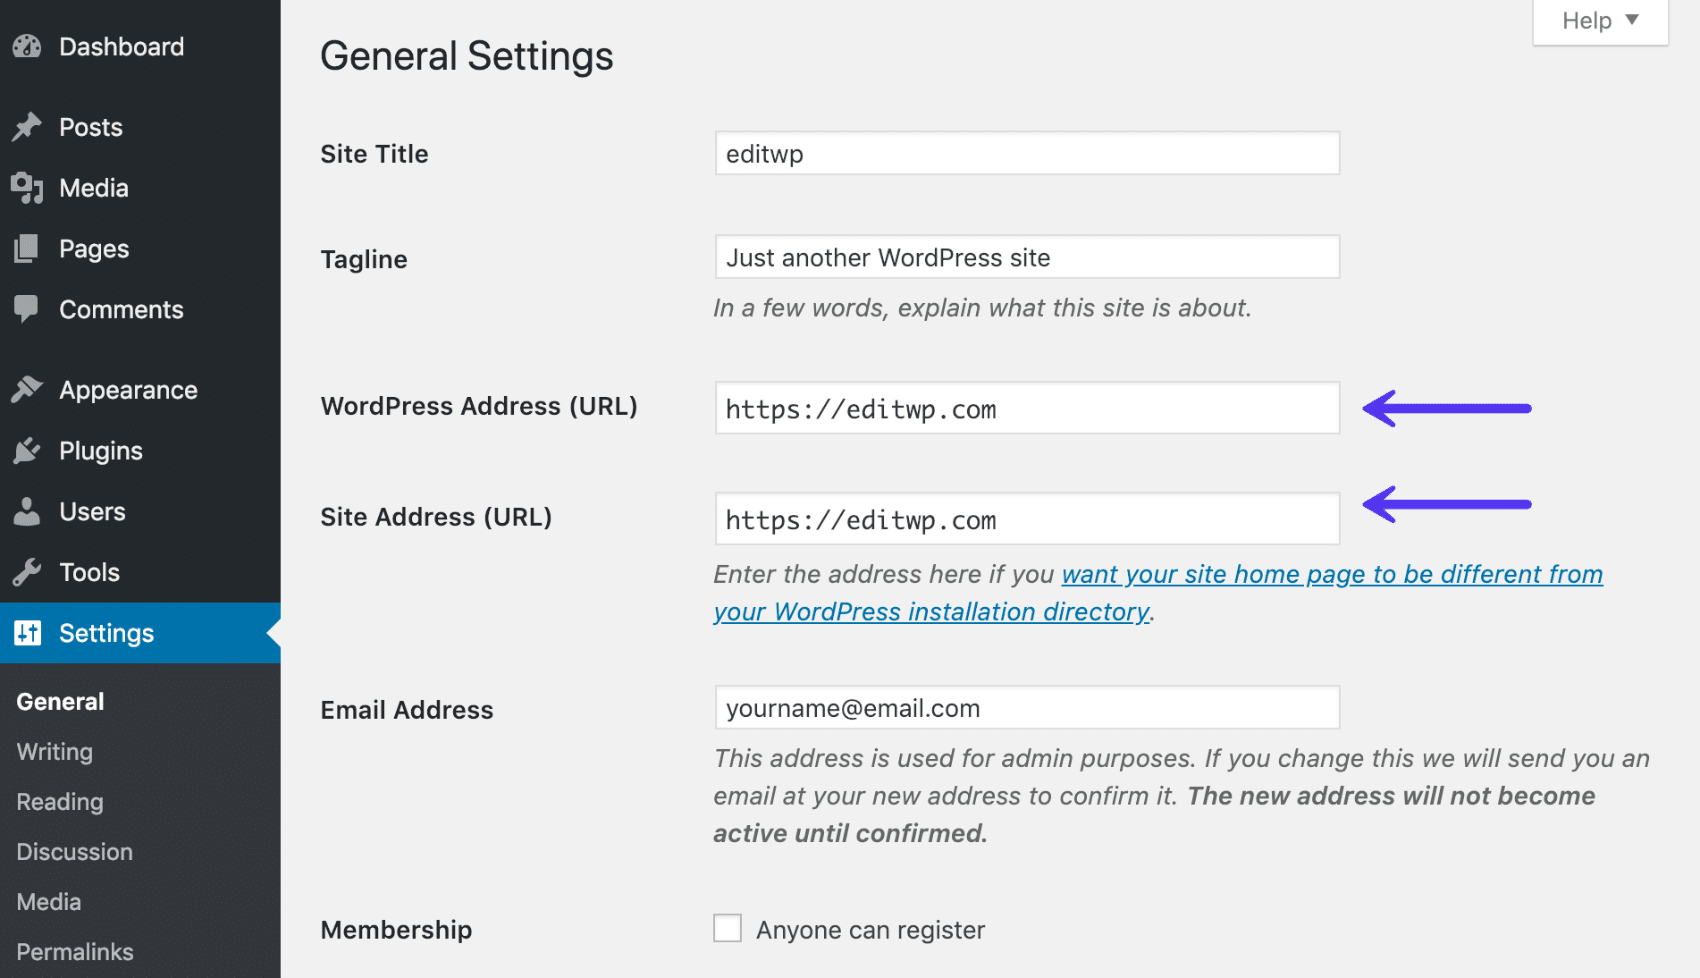
Login to your WordPress admin dashboard and go to Settings → Full general. Then update your WordPress accost URL and site address URL with your custom domain.
Step 4
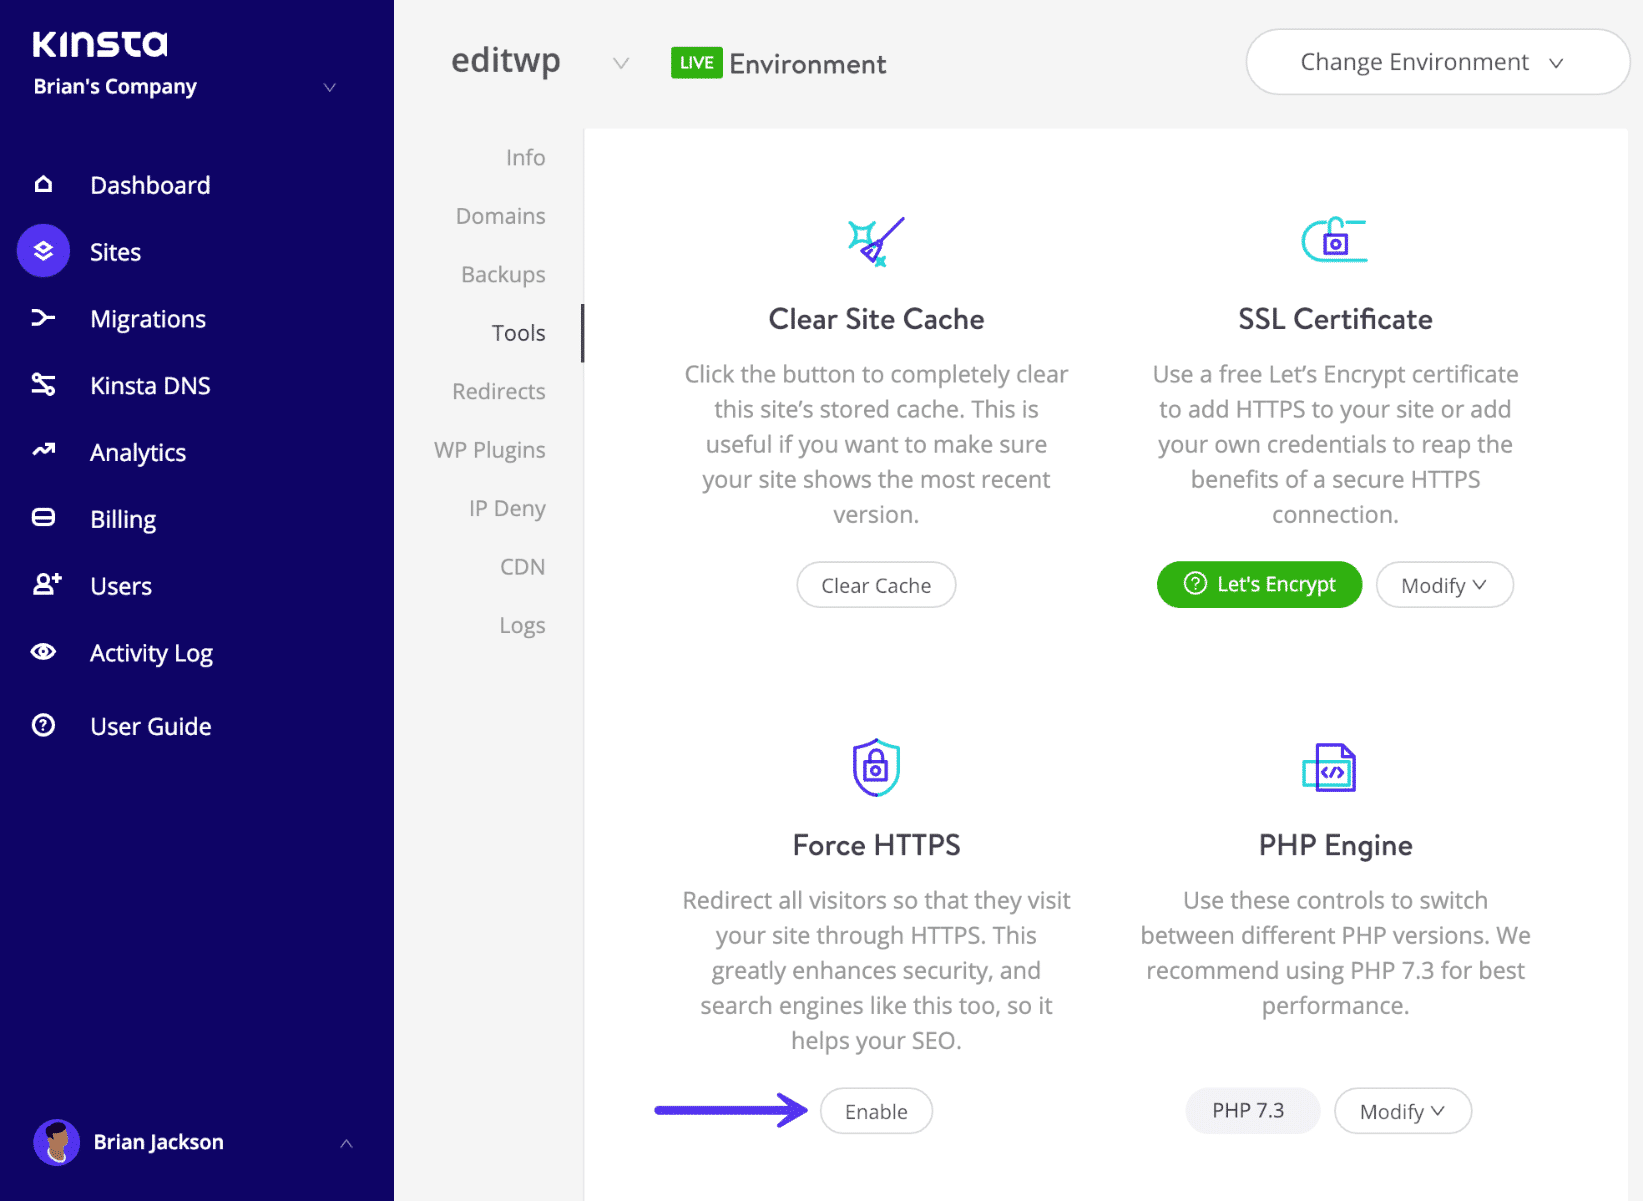
If you lot're using HTTPS, y'all will besides desire to redirect all the HTTP traffic to HTTPS. You can employ the Force HTTPS tool to enable this choice in the MyKinsta dashboard.
And that's it! You lot accept manually installed WordPress and your site is upward and running over HTTPS with a custom domain.
Save time, costs and maximize site performance with:
- Instant help from WordPress hosting experts, 24/seven.
- Cloudflare Enterprise integration.
- Global audience reach with 29 data centers worldwide.
- Optimization with our congenital-in Awarding Performance Monitoring.
All of that and much more, in 1 program with no long-term contracts, assisted migrations, and a 30-day-money-dorsum-guarantee. Cheque out our plans or talk to sales to find the plan that'south right for you.

Source: https://kinsta.com/knowledgebase/manually-install-wordpress/
Posted by: blackwastain.blogspot.com
0 Response to "How To Install Wordpress On Your Domain"
Post a Comment